 |
| Roxy after about 20 minutes of playing with the hose |
Thursday, March 31, 2011
Foxy Roxy
Wednesday, March 30, 2011
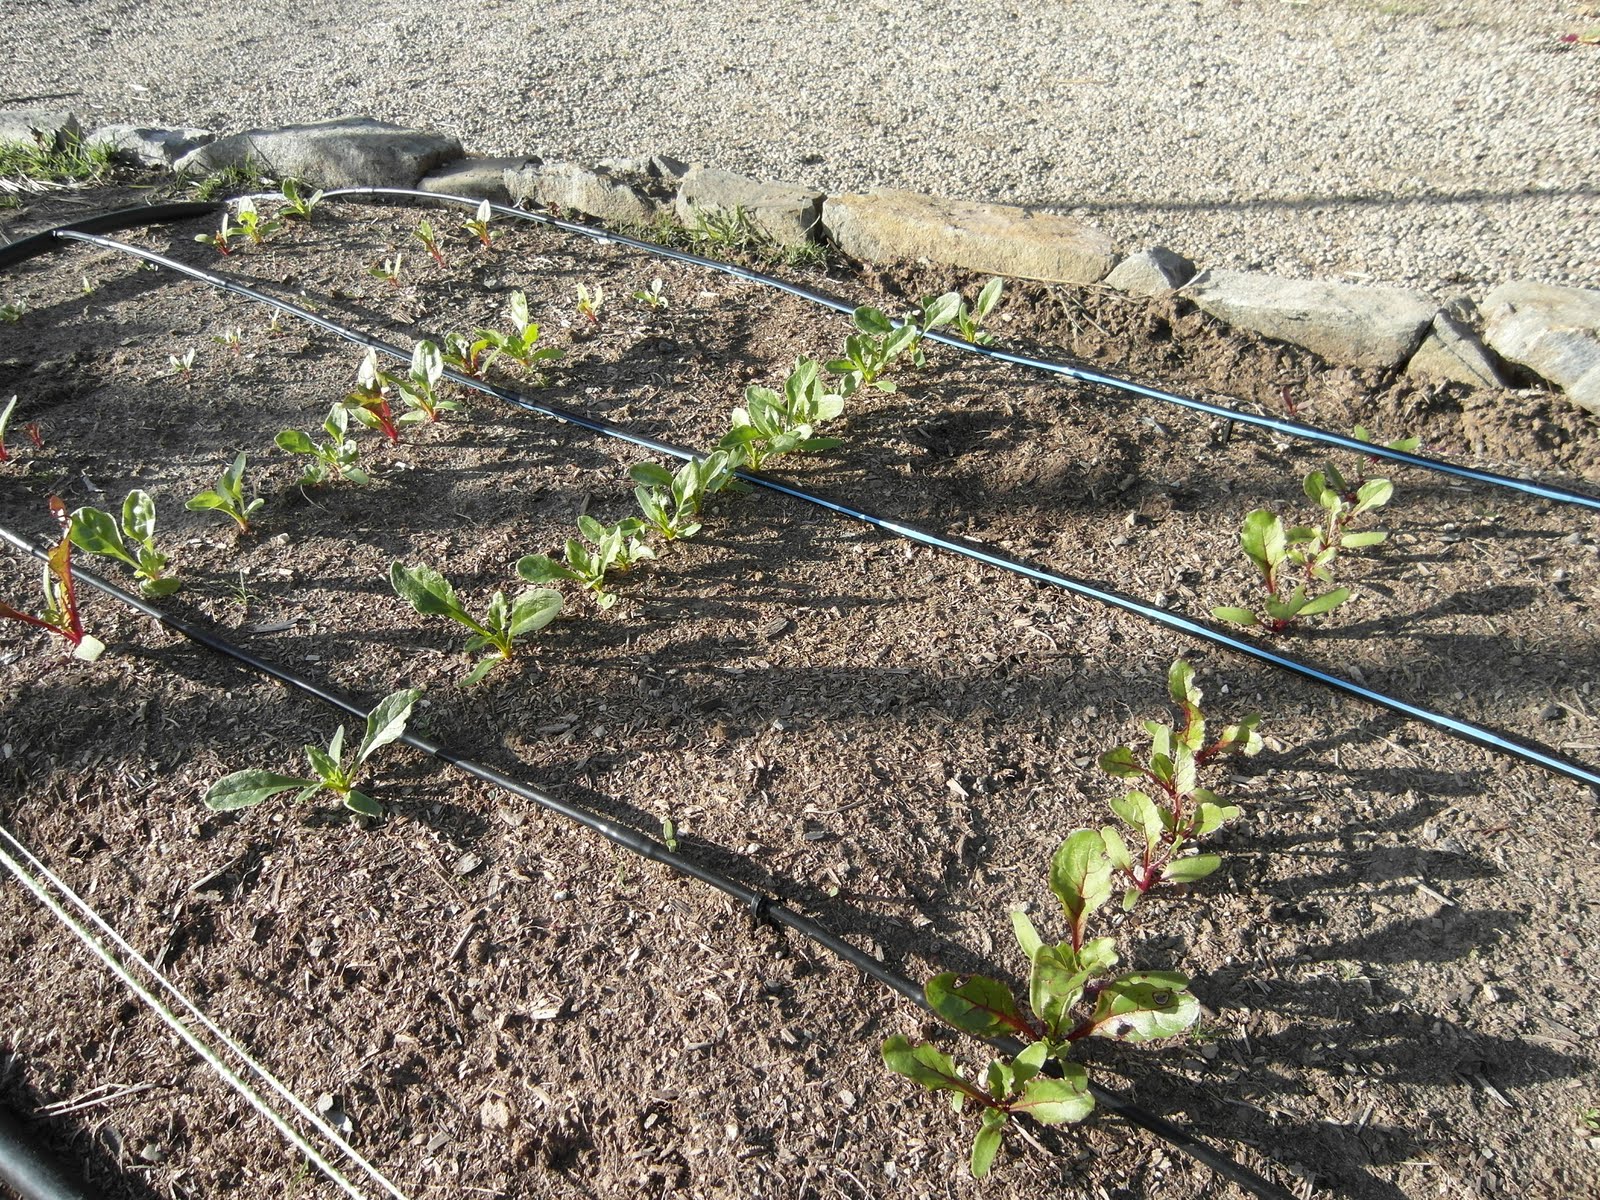
Floating Row Covers
 |
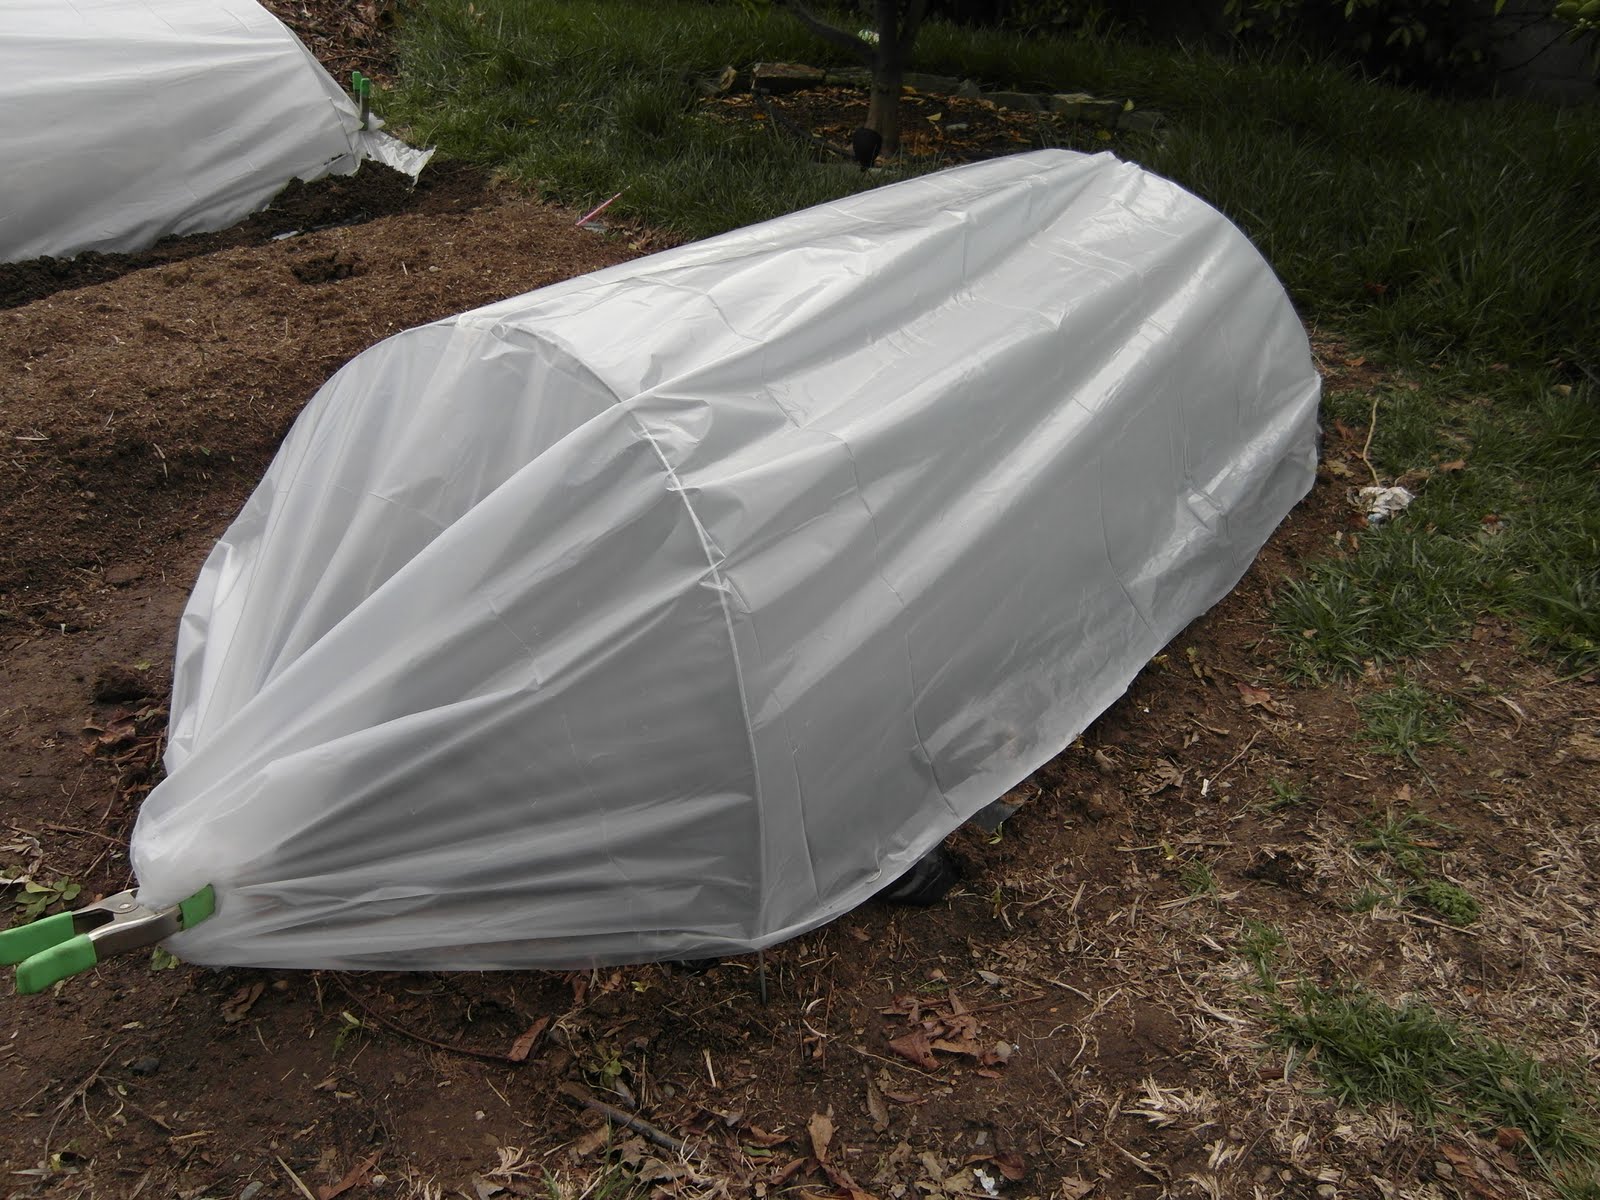
| Pipes around the perimiter keep the edges down, then I use stakes on the ends. I'd like to get some old fire hose and fill it with sand as a perimiter weight. |
 | ||||||||||
| You can just barely make out the beet seedlings under the cover |
Monday, March 28, 2011
Mulch Madness!
See that title? See how clever I am??
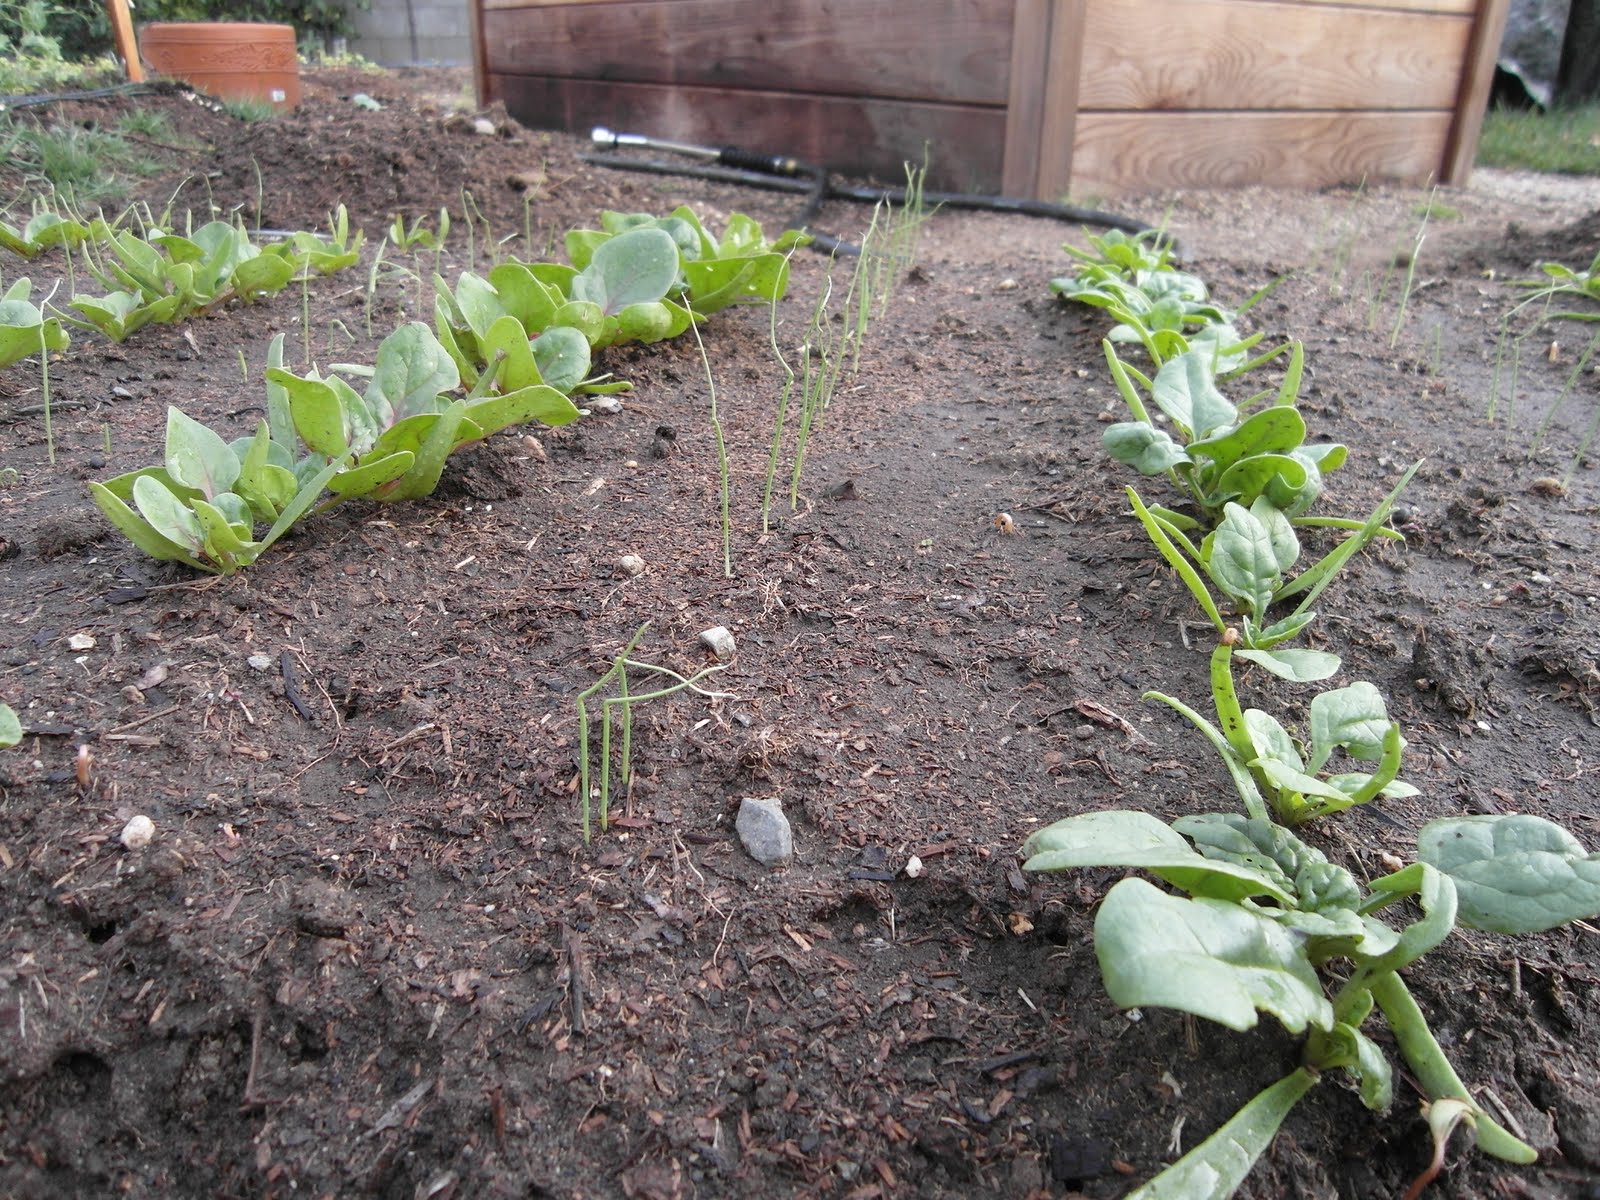
Busy work(day job) day, not much farm action. The mulch on the carrots and beets is working perfectly, you can definitely see the difference in the darkness of the dirt where it's wet around the mulch. I planted a long band of onions in the West 50% of EW5 on the North end which I'm hoping will reduce the shading on plants on either side. In the East end of that bed I had previously planted alternating North-South rows of spinach and onions and later realized that the onions will most likely shade out the spinach a bit as the sun heads for it's Westerly home. This time with the onions planted as a backdrop to the spinach there should be plenty of sun to go around.
No photos Today but I caught Chui eating Japanese Beetle Grub Carcasses (When I find em' I step on em' and they "pop" with a stream of guts shooting through the air. Good fun!) Anyways, he eats them which isn't surprising considering dogs also like to eat cat poo ("Cookies" I've heard them called) and then later, after I'm deep asleep and in the middle of a Zombie nightmare, typically about 3am I'll wake to his dry-heaving sounds as he is about to barf. I leap from bed while conjuring up my best "good dog" sweet voice calling him to follow and SPRINT (negotiating several 90degree corners on varying surface materials) to the back door, all in the hope he'll finally yack outside.
I didn't realize until writing with such detail (and pleasure) about my grub murdering that.... this is Karma; Chui barfs and ruins my night because I kill grubs.
Sunday, March 27, 2011
Mulched Carrot Seeds
 |
| Yet another fine example of quickly I would be fired if I worked on a real farm. |
Anyway, I came across a couple posts about mulching newly sown carrot seeds with various materials; burlap, weed screen/landscape fabric, etc. See, carrots take their sweet-ass time to germinate and they MUST stay moist during the 2-3 weeks it takes for them to wake up. It can be a challenge to keep them moist without a single failure, especially if you are like me and have a day job. The idea of mulching now seems so obvious a solution I'm annoyed I didn't think of it myself! I ended up using weed cloth, triple folded and staked to the beds to cover my new seeds. Because I sowed between existing rows it was a bit more work, requiring a "strip" of mulch for each row.
 |
| 14awg wire for "stakes" - you could also cut up clothes hangars if you have extra... |
 |
| Had to thin out some of my carrots and it's fun to see... well, to see that they ARE carrots! |
Saturday, March 26, 2011
Sowing, Transplanting and First Harvest!
 |
| new carrot rows between existing rows. I'm hoping that the existing ones don't shade out the new seedlings. An even bigger worry is the liquid amber that's budding new leaves and may shade everything out. Chainsaw. |
- 2 more rows of each carrot, sown between the existing rows after reading and getting the impression that I had spaced my rows too wide
- 5 more rows of beets directly sown between the existing beets and carrots
- transplanted ~20 each of Tatsoi, Escarole and Endive in the North end of SW1 bed
Part of the transplanting to SW1 was removal of existing plants, it was primarily Collards which I learned I don't much care for. No tears for the Collards.

I couldn't really figure out the best way to remove the plugs from the cell sheet. I ended up pushing up the bottom to release the contents, then squeezing the side like you would an otter pop. Another method I tried was to push the bottom with my finger while gently pulling up by some of the leaves.
Loosened the roots and dropped em' in place then a good long drink and I'm done. I like direct sowing much better, transplanting takes a long time and feels like double work.

I'm also sending out my first harvest notification because I realized I have a bit more than I can eat right now. Still MUCH less than I intended to get up to, but just enough for one or two people to come get salad stuff.
Available stuff:
- Smooth leaf spinach
- Savoyed leaf spinach
- Baby beet greens
- Baby Swiss Chard ("Bright Lights") Greens
- Tiny bit of Arugula
- Regular Chard (lots of bug holes)
Thursday, March 24, 2011
Recovering From a False Start
 |
| The hand clamps on the end stakes keep the end of the tarp in place and make it easy for me to open the ends to vent or water or just check on things. |
Then it cooled off. It cooled off a lot, about 15 degrees and we had two storms come through (a third as I write this). My warm weather guys stopped growing, they started to pale in color a bit and generally not look so hot. I figured I'd use the opportunity to dry some basic home made low tunnels to increase the temp, create a sort of little mini-greenhouse.
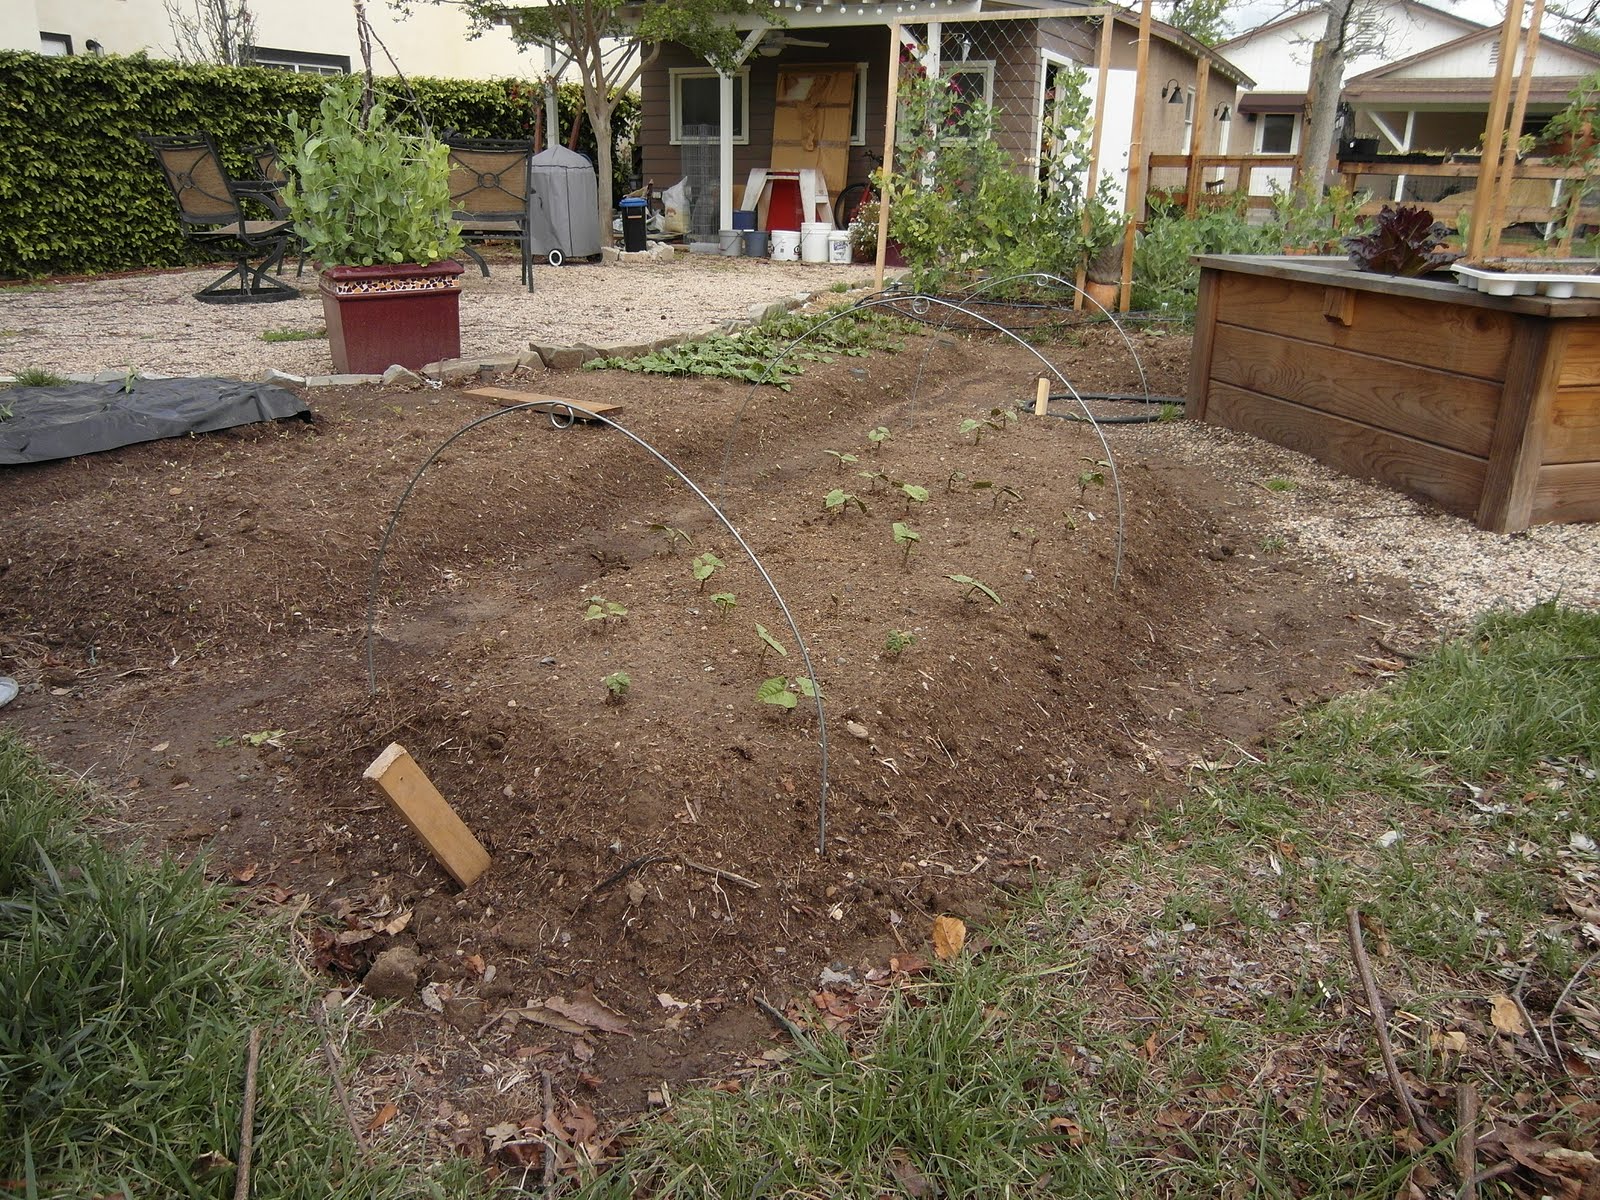 |
| Hoops and anchor stakes in place for the bean bed |
- I purchased some 3mil plastic tarp
- 170' of #9 "tension wire" used for chain link fences - this would be used for the hoops
- Garden hoe
- Gather my twine, some stakes and a couple hand clamps
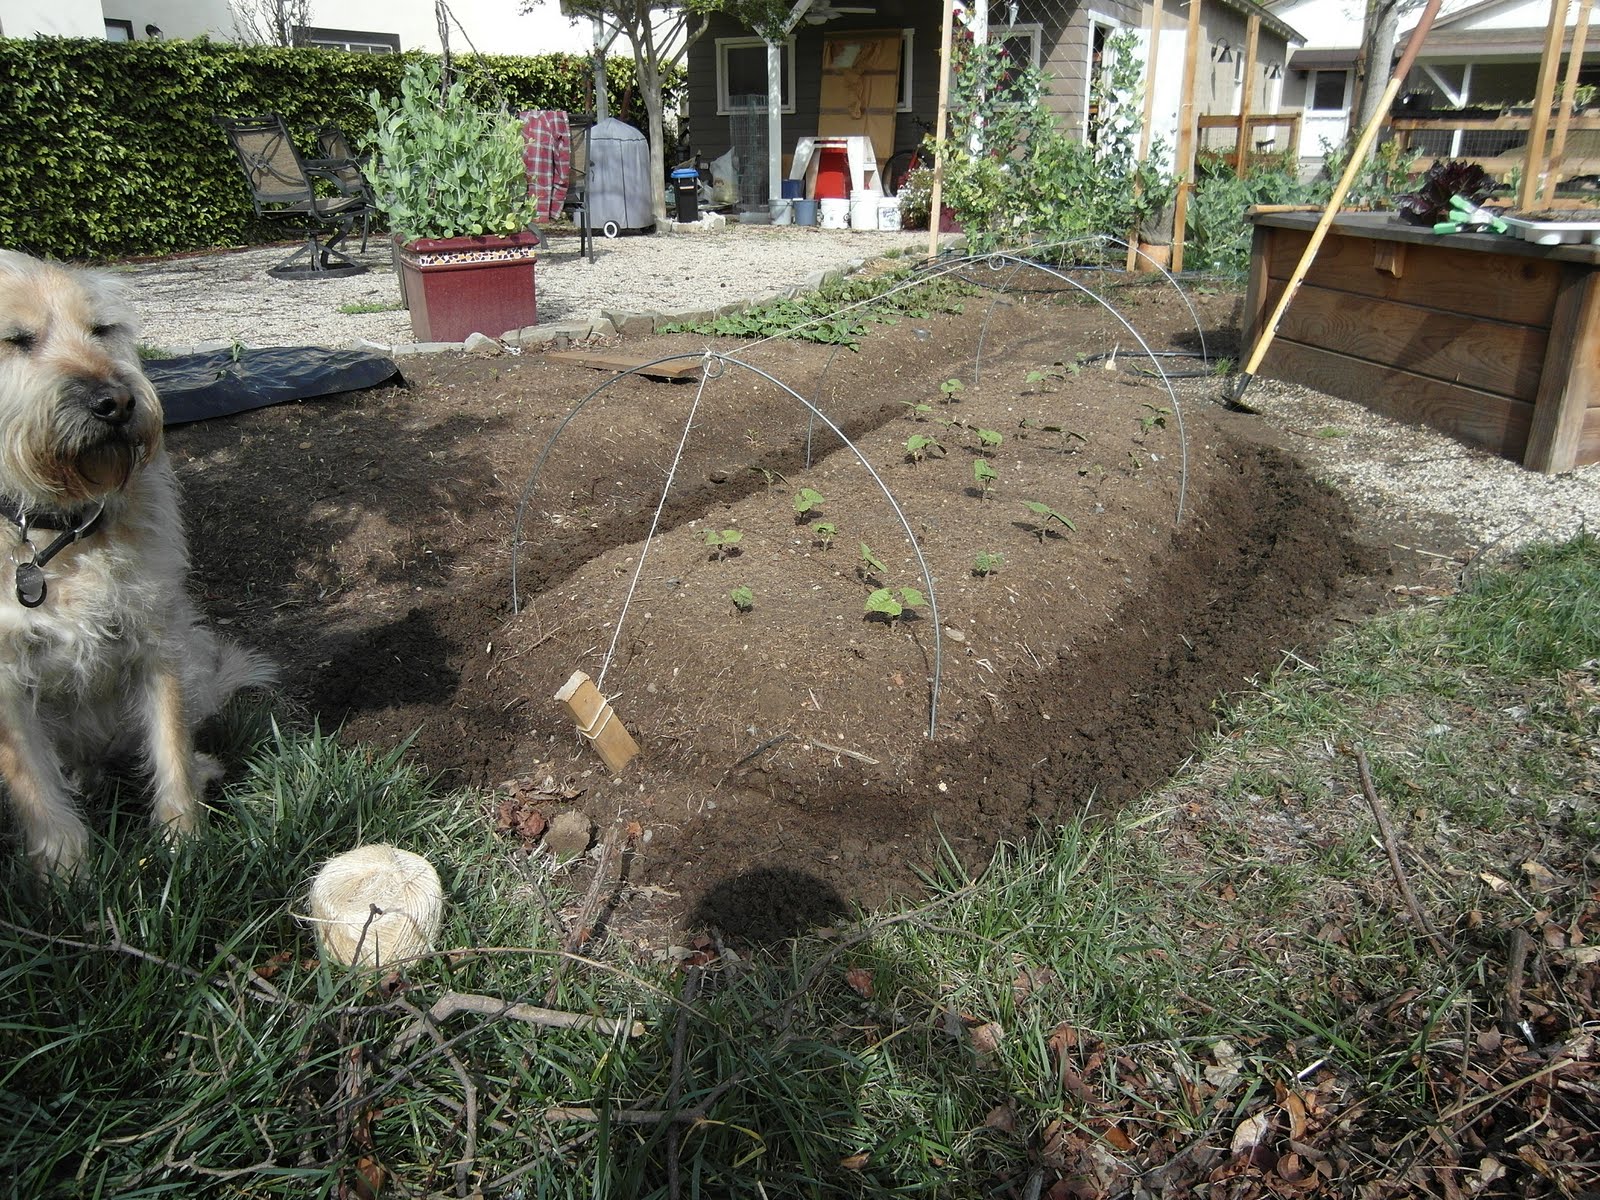 |
| Hoops tied together with twine and anchored at each end to the stakes. If he's not lying down he's sleeping standing up... bastard! |
Funny side note on the wire: Was at Home Depot and the price was missing from the wire so they had to lookup the price in their photo reference book. Well, they picked the wrong item and rang it up for about 1/2 what it should have been. I love it when that happens and I don't feel bad about it; god knows I've spent enough money there.
Anyway, so I figured out the shape and size I wanted the hoops to be, then made some pen marks on my workbench as reference so I could create reasonably consistent pieces. I then stuck them along the bed and used my twine to tie them together and anchor to the stakes at each end. I used the Hoe to drag a shallow trench around the perimeter of the bed to bury the edge of the tarp material to keep it down. I then draped the tarp over, pulled it tight at the ends and kicked dirt back over the edge of the tarp. Done, easy.
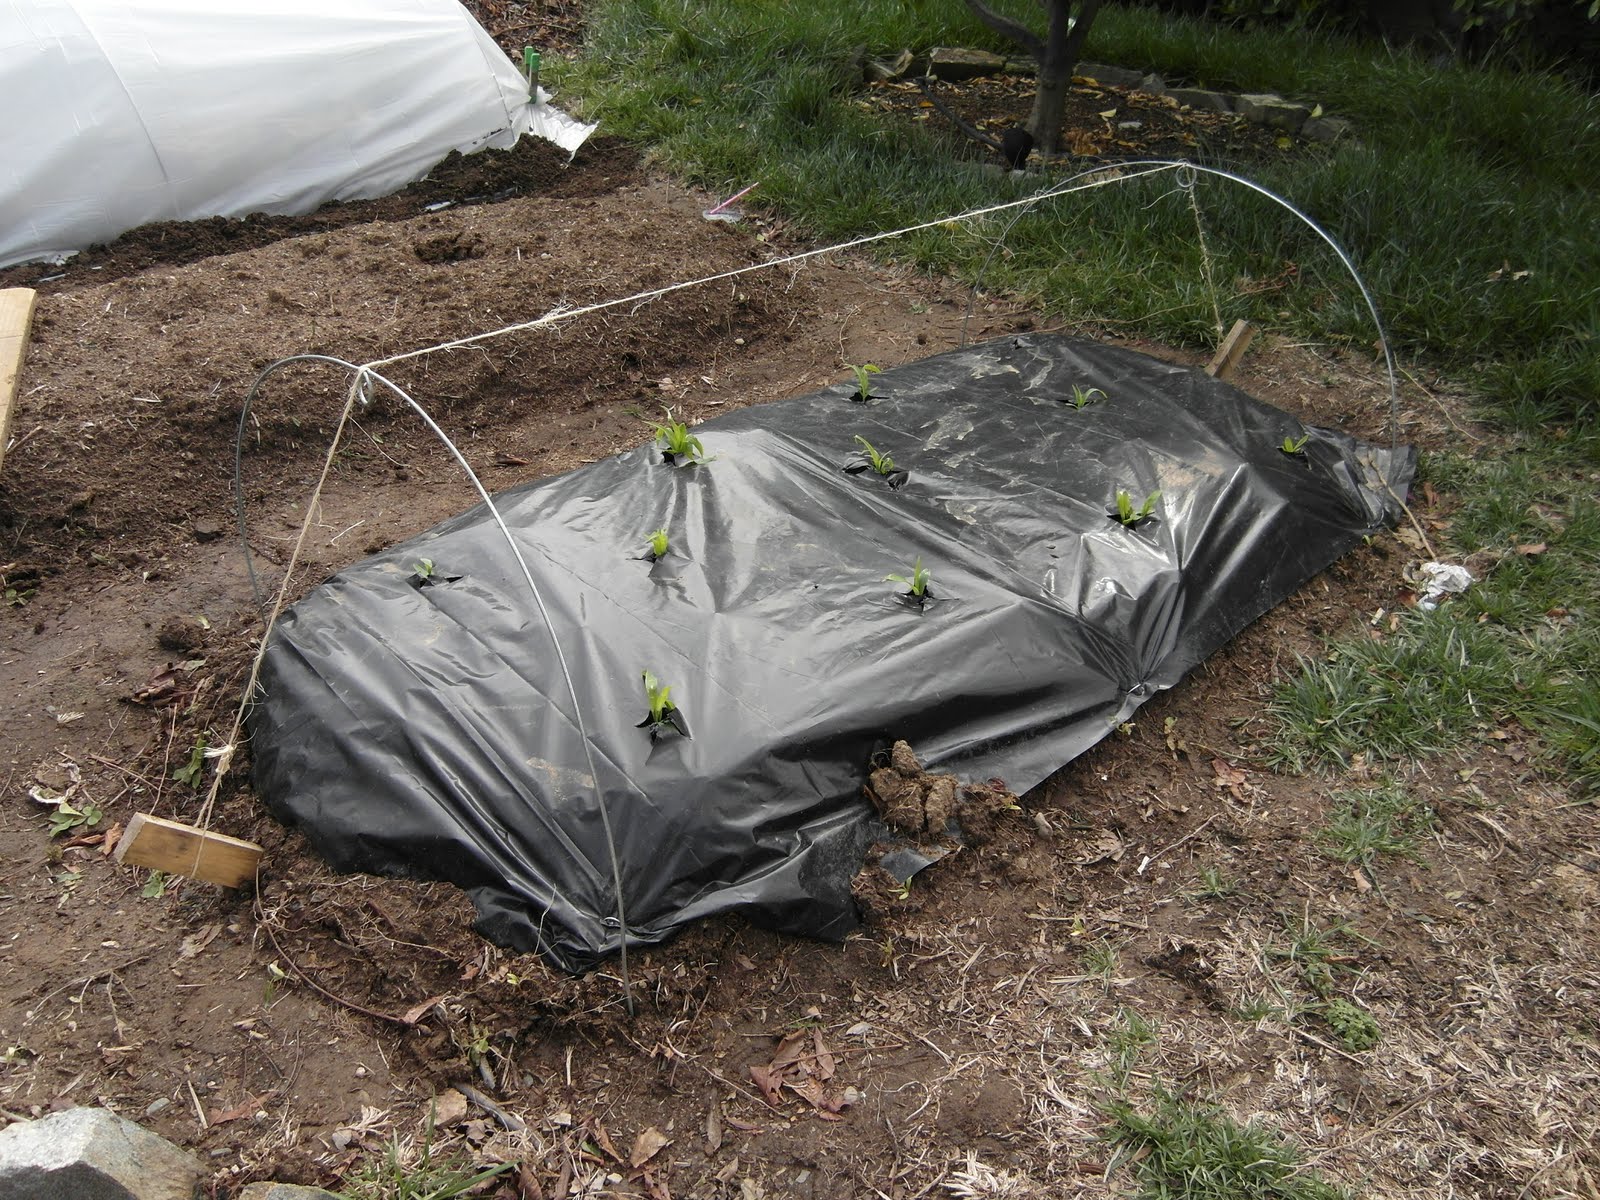 |
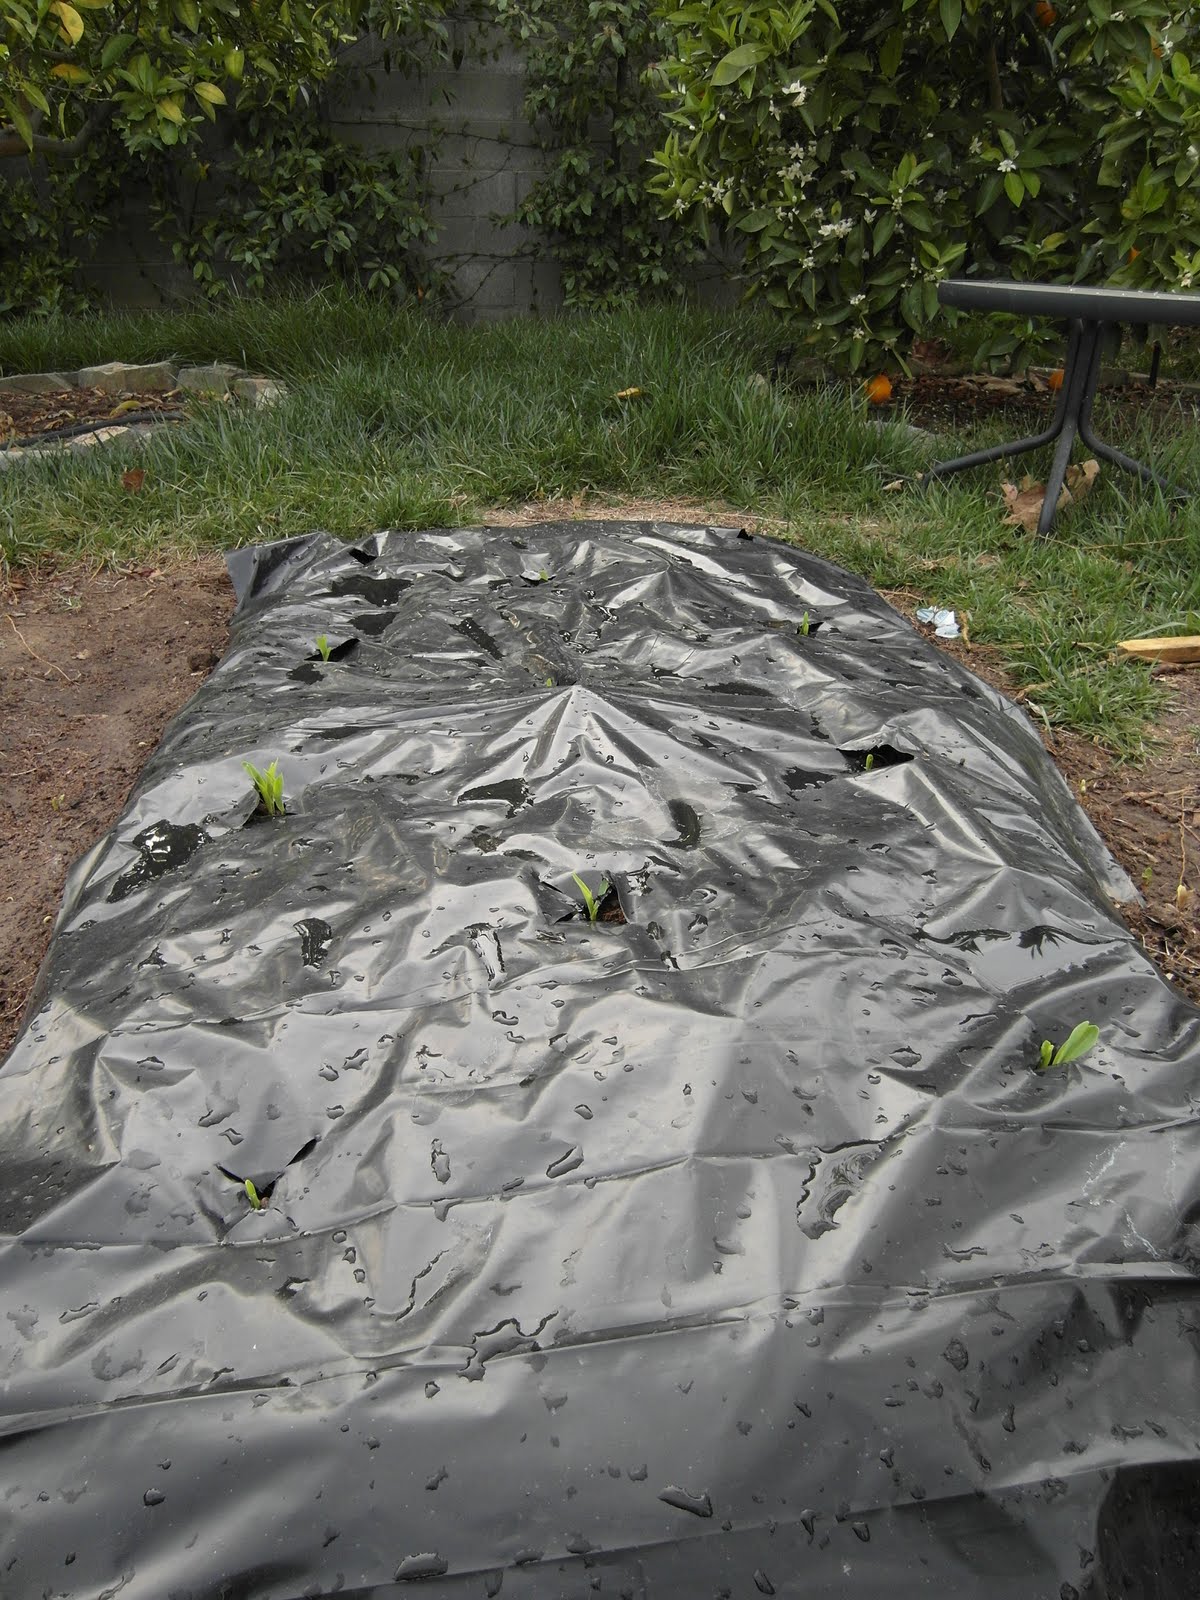
| corn bed with soil warming black plastic |
I placed my various cell containers of seedlings in between the beans plants so they can bask in the heat as well. After the this bed was done I moved on to the corn and did pretty much the same thing. Start to finish, including Home Depot trip I'd say this took me two hours which was a perfect break in an otherwise hectic and busy work day.
Tuesday, March 22, 2011
BountifulGardens.org - Waste of time!
March 7th 2011 I placed order #6185889 for the following items:
- VGR-3825 Aurora Orach 2 $4.00
- VGR-3800 New Zealand Spinach, Greens 1 $2.00
- VGR-3750 Egyptian Spinach Greens 1 $2.00
- VGR-3790 Malabar Spinach Greens 1 $2.50
On March 17 when I hadn't received my order I called to ask about it and was told "it hasn't shipped, we're really busy, everyone wants seeds right now" Not really an apology, not a "Oh I'm really sorry for this delay, I know we're probably throwing off your schedule. We'll try to get it out ASAP, SORRY!" The woman on the phone said that it would "definitely go out that day" and that she would "tag it" or something like that that I took to mean she would make sure the warehouse got it out that day.
You sell seeds, that's your business. You purchase, market, sell and ship seeds. Don't tell me "we're really busy, everyone wants seeds right now" Work late then, hire temp help, work weekends - get it done.
Today I still had not received my order so I called again to ask. I was told "Looks like we're waiting for the Orach" to which I responded "This is ridiculous, just cancel my order"
So, I wouldn't suggest that anyone order from BountifulGardens.org. It's one thing to get caught by surprise and under deliver, I could handle that if they had the right attitude but this company couldn't have cared any less if they had my business. So they won't and I hope that some people reading this will consider this before ordering from them as well.
Thursday, March 17, 2011
Spinach and Onions
I was disappointed to find that the shredded leaves that I integrated into the two large East-West beds are untouched by worms and do not appear to have decomposed at all. Disappointed because I need to plant in those beds soon and I'm afraid that he active decomposition (assuming it starts, god!) will throw things off. To make matters worse, my buckwheat cover crop will be turned in soon and that will create a nice composting situation right there in my bed. Great.
/sarcasm
Tuesday, March 15, 2011
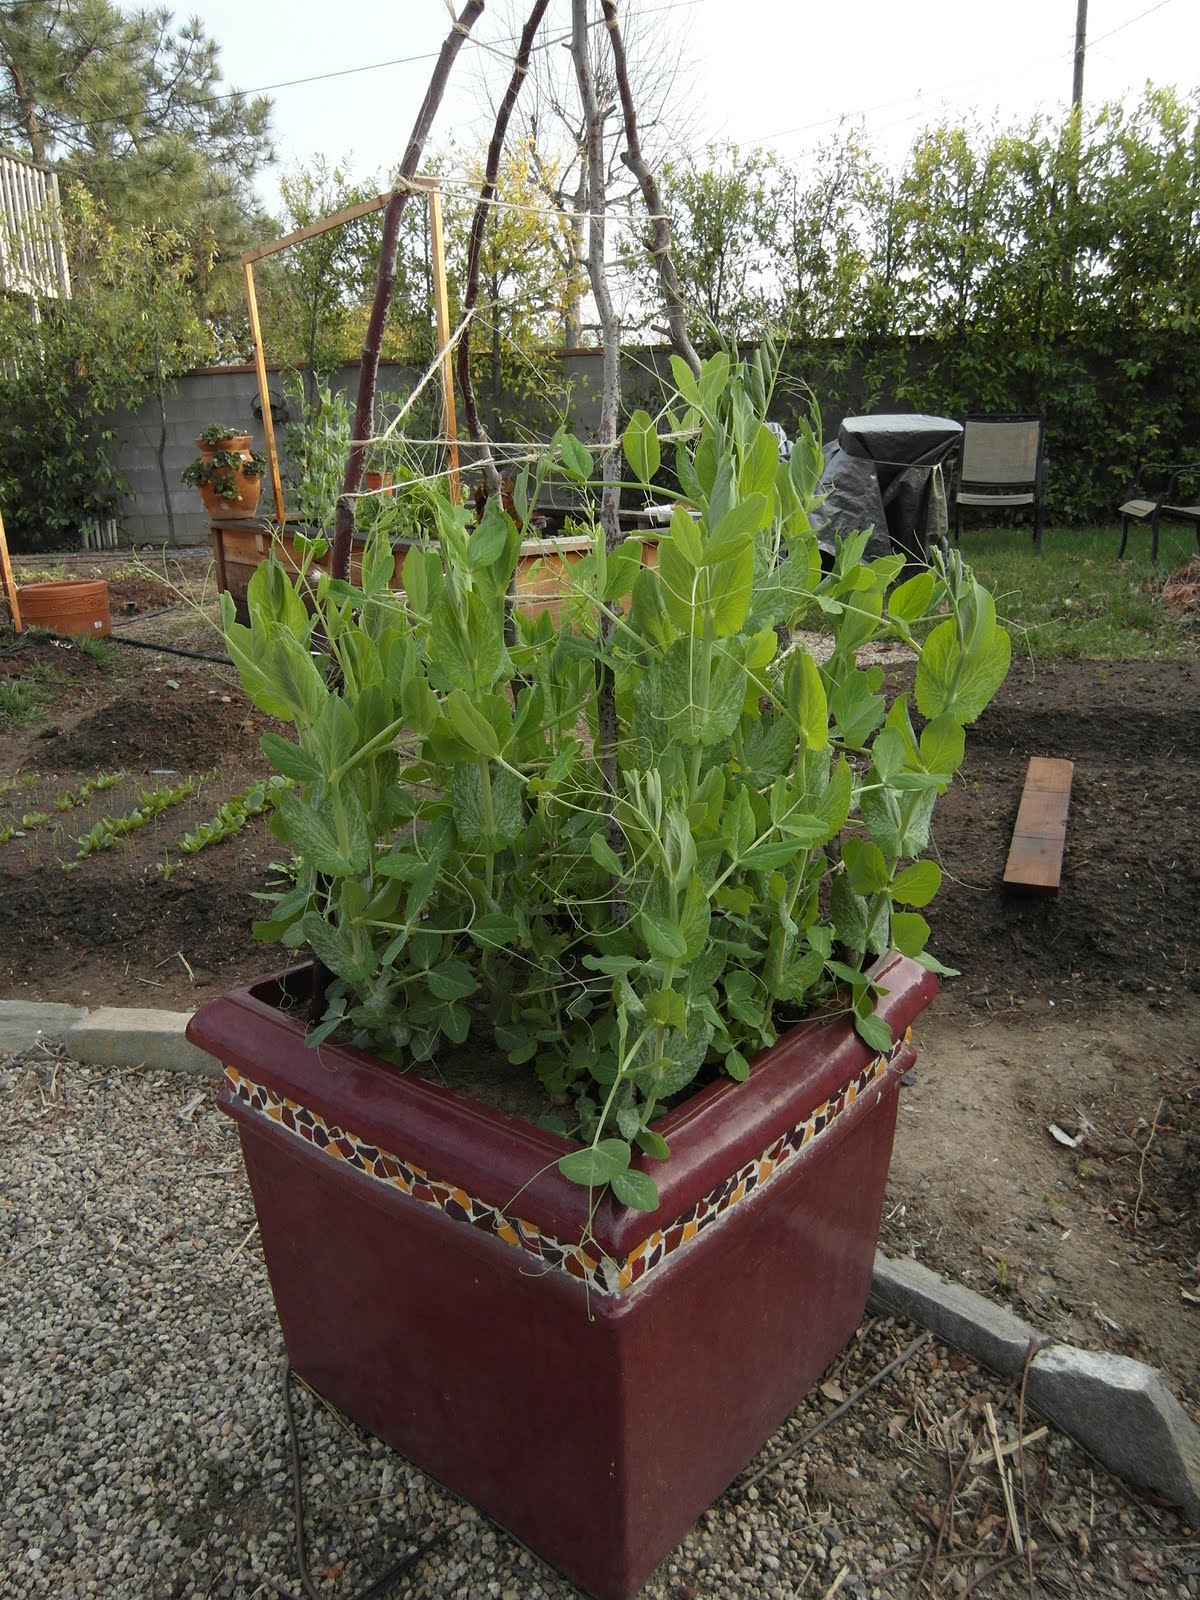
Coming Out Party for my Snow Pea TeePee
Sunday, March 13, 2011
Corn Workin'

Was happy to see my Corn make an appearance finally. We've had some warmer weather so I'm thinking that pushed it into action. I've setup the pattern so that I will hopefully get decent pollination without manual intervention from me. See, corn is really amazing, it self-pollinates(monoecious) as it has both a male and female flower. The mail flower is at the top, the "tassel" and the female flower is the corn silk that protrudes from the husk. A silk for each kernel; any that are missed will leave a blank spot in the cob. So the wind blows the pollen from the tassel which with the assistance of gravity falls down making contact with (and sticking to) silks along the way. As if that wasn't amazing enough, as each silk is pollinated it will turn brown and dry up - it's job is done.
I planted an early variety that will hopefully handle the still unstable weather and occasional cool day/night and still yield a decent harvest. I like corn, but I already have this feeling that in a "space-challenged" growing area it may not be worth the work.
Friday, March 11, 2011
Moving Day
 |
| larvae attached to the lantana leaves, I removed the whole leaf rather than try to remove the larvae |
I placed the cut off leaves with larvae attached on or near the most heavily infested plants in the garden, the plan is that they will begin to hunt the aphids and other soft bodied pests that have been increasing in numbers lately. I'm also going to get some lantana and flowers in the ground to try and keep the lady bug colony thriving.
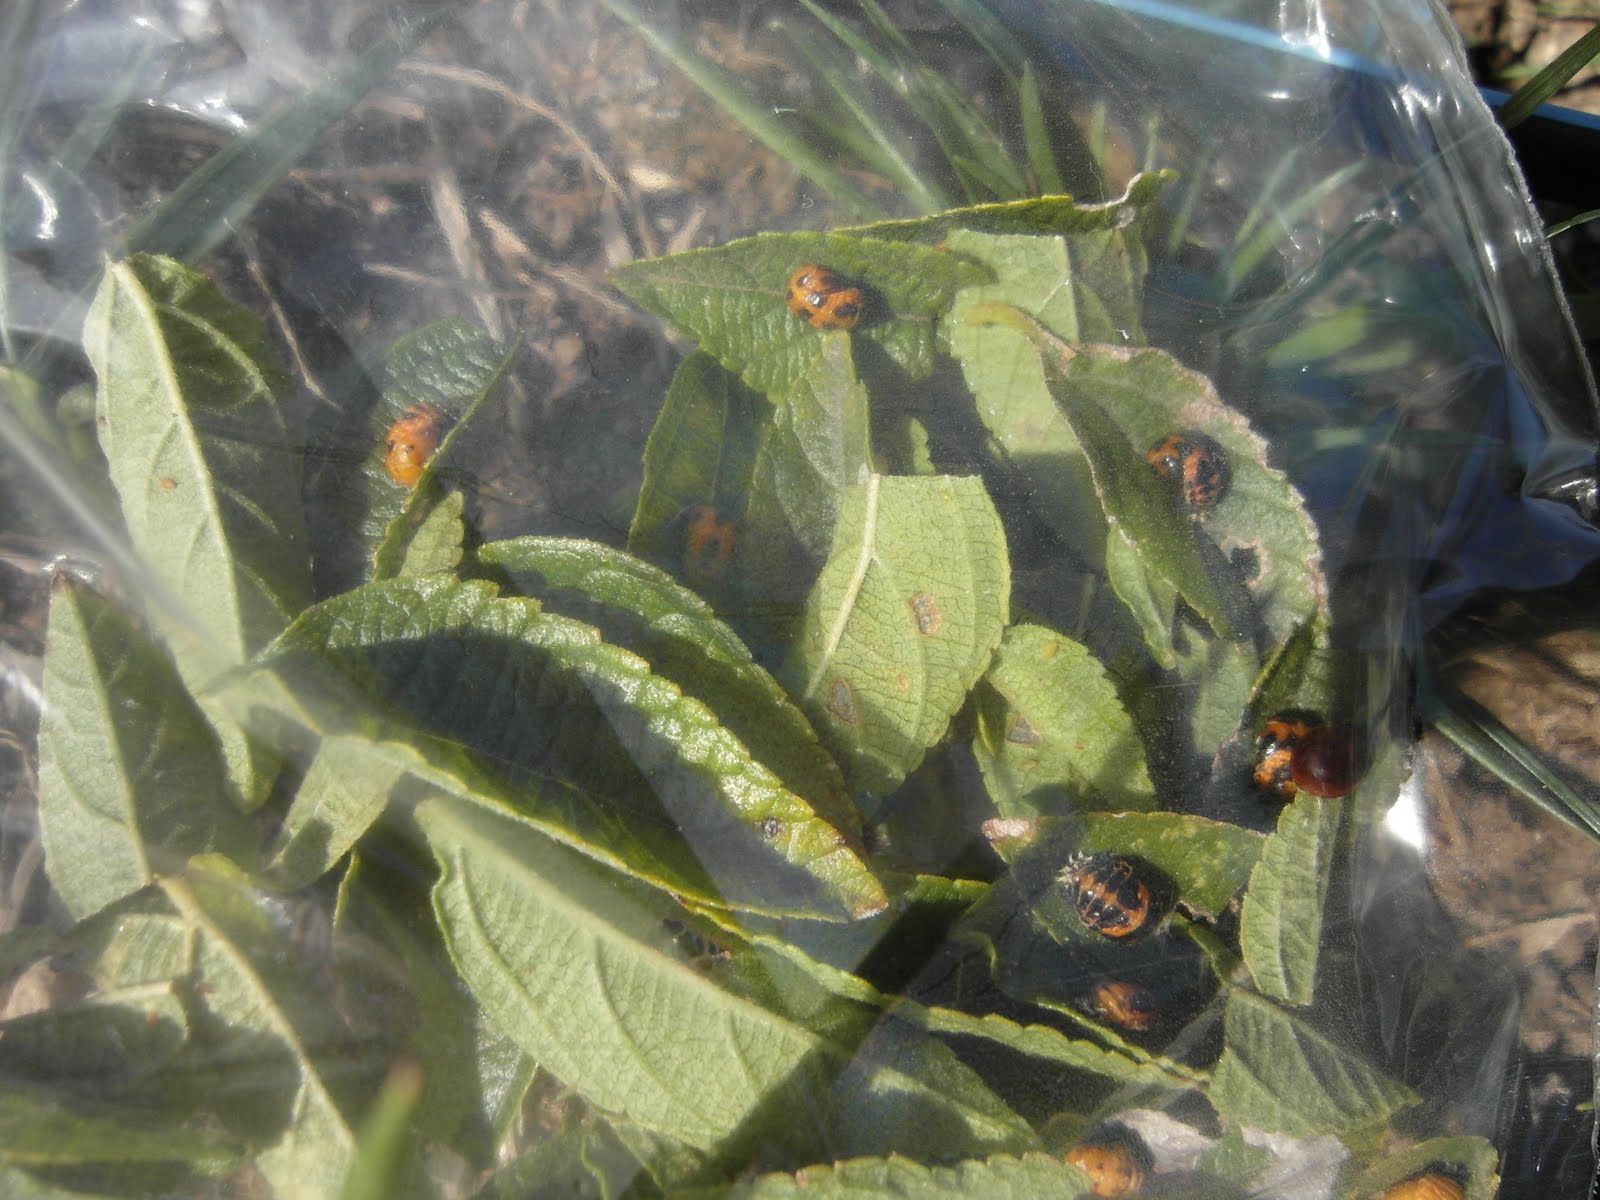 |
| a few juveniles and many larvae |
 |
| Example of some lantana leaves placed on the red romaine lettuce. |
Thursday, March 10, 2011
Lady Bug Larvae
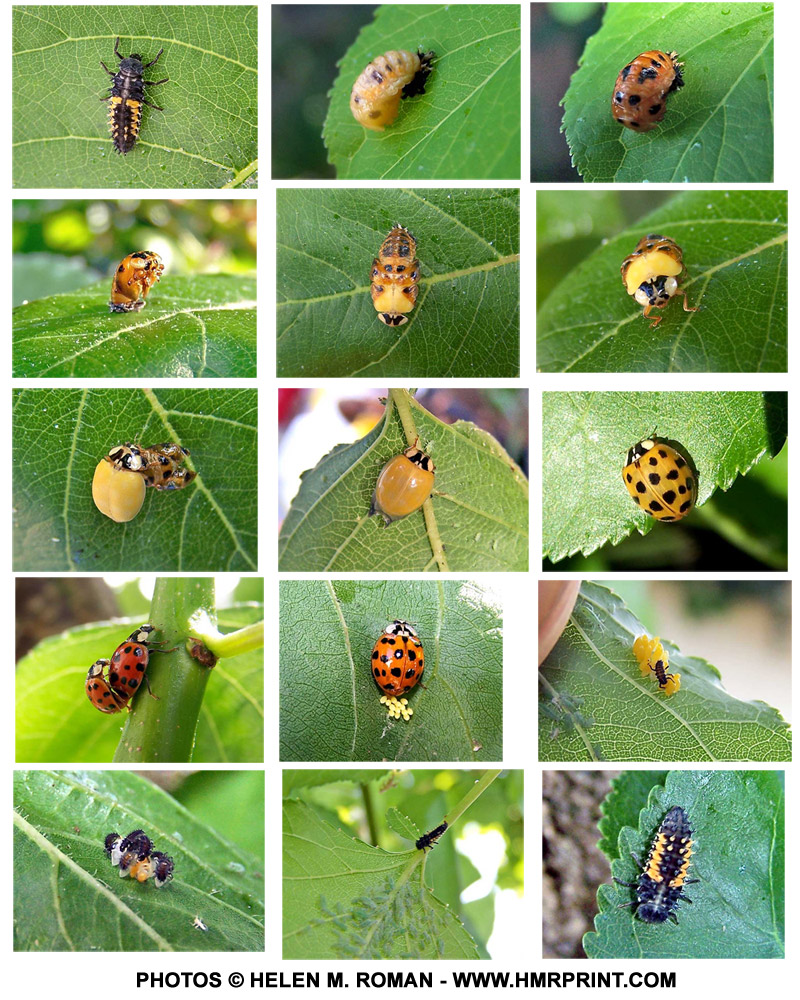 |
| Not my photo, I ripped it from the interwebs. Whatever! |
While researching the various insect pest problems I'm having I came across a photo of the very insect we were molesting just days ago and hotdamn! - it's a ladybug! Of course there will be no more senseless killing, but rather nurturing and care. I plan to remove several of the branches and relocate to my vegetable garden area with the highest aphid population, I'm hoping I can get a ladybug colony established.

Tuesday, March 08, 2011
Complacency
I've noticed a spike in evidence of leaf chomping lately, it seems that just about everything is being chewed on a little. I feel guilty because I know, deep down inside my procrastinating little heart that I'm responsible; I've become complacent and eased my assault on the SLUG! Sure enough a quick night hunt (I'm just back, exhausted and refreshing with some Stoli on the rocks) was productive, easily I bagged 10+ slimy little bastards, may their souls rot in hell for all eternity.


A day without learning is a day wasted - I just made that up and while not terribly profound or original I do like the sound of it and it's how I live my life. With that said, I noticed I have the no-longer-so-cute "rollie-pollie" (Armadillidiidae - "Sow Bug", "Pill Bug") bugs ALL OVER THE PLACE, in fact next to the Boxelder I'd say the pill bugs are the second highest population in my garden microcosm. I did a bit of research and while not typically considered a pest, they are of very little value. Furthermore they can, in Southern regions and in large quantities (like mine!) be destructive to plants and eat live plants in addition to decaying organic material. Pill bugs are now being considered for my kill list. Stay cool boxelder, keep doing your thing, stay away from my garden and we're fine.
I'm also noticing aphids all over stuff. Of course I'm using organic methods which means I can't just start spraying poison all over the place like I'd like to. I've consulted my books and the guidance is varied with "increasing beneficial insects" as the most common theme. Id' love to! - but it's not easy to get lacewings, lady bugs, assassin beetls, etc. to show up and stick around. I'll be buying some flowering shrubs and annuals to hopefully attract them. The second most common suggestion seems to be using a strong stream of water to blast them off. I'll try everything and hit them with the full assault.
Monday, March 07, 2011
Seeds are Shaping Up
 |
| (left to right) 3 rows of swiss chard "Bright Lights", single row of golden beets and on the far right a single row of red beets |
I'm still having uneven germination and growth rates but I'll worry about that later. While doing a little thinning I was eating the micro greens rather than toss them and was AMAZED at how delicious the spinach was - I have never tasted buttery, sweet spinach before and if that's what I'm in store for then this will be well worth the work.
Sunday, March 06, 2011
Disabled List
Majorly agitated my already messed up back on Saturday, woke up this morning and couldn't even get out of bed properly. No work Today, hopefully me back will calm down while I sleep Tonight. Beautiful day with a nice slight breeze, new seedlings emerging nicely, things looking good overall.
Saturday, March 05, 2011
Lights and Night Shots
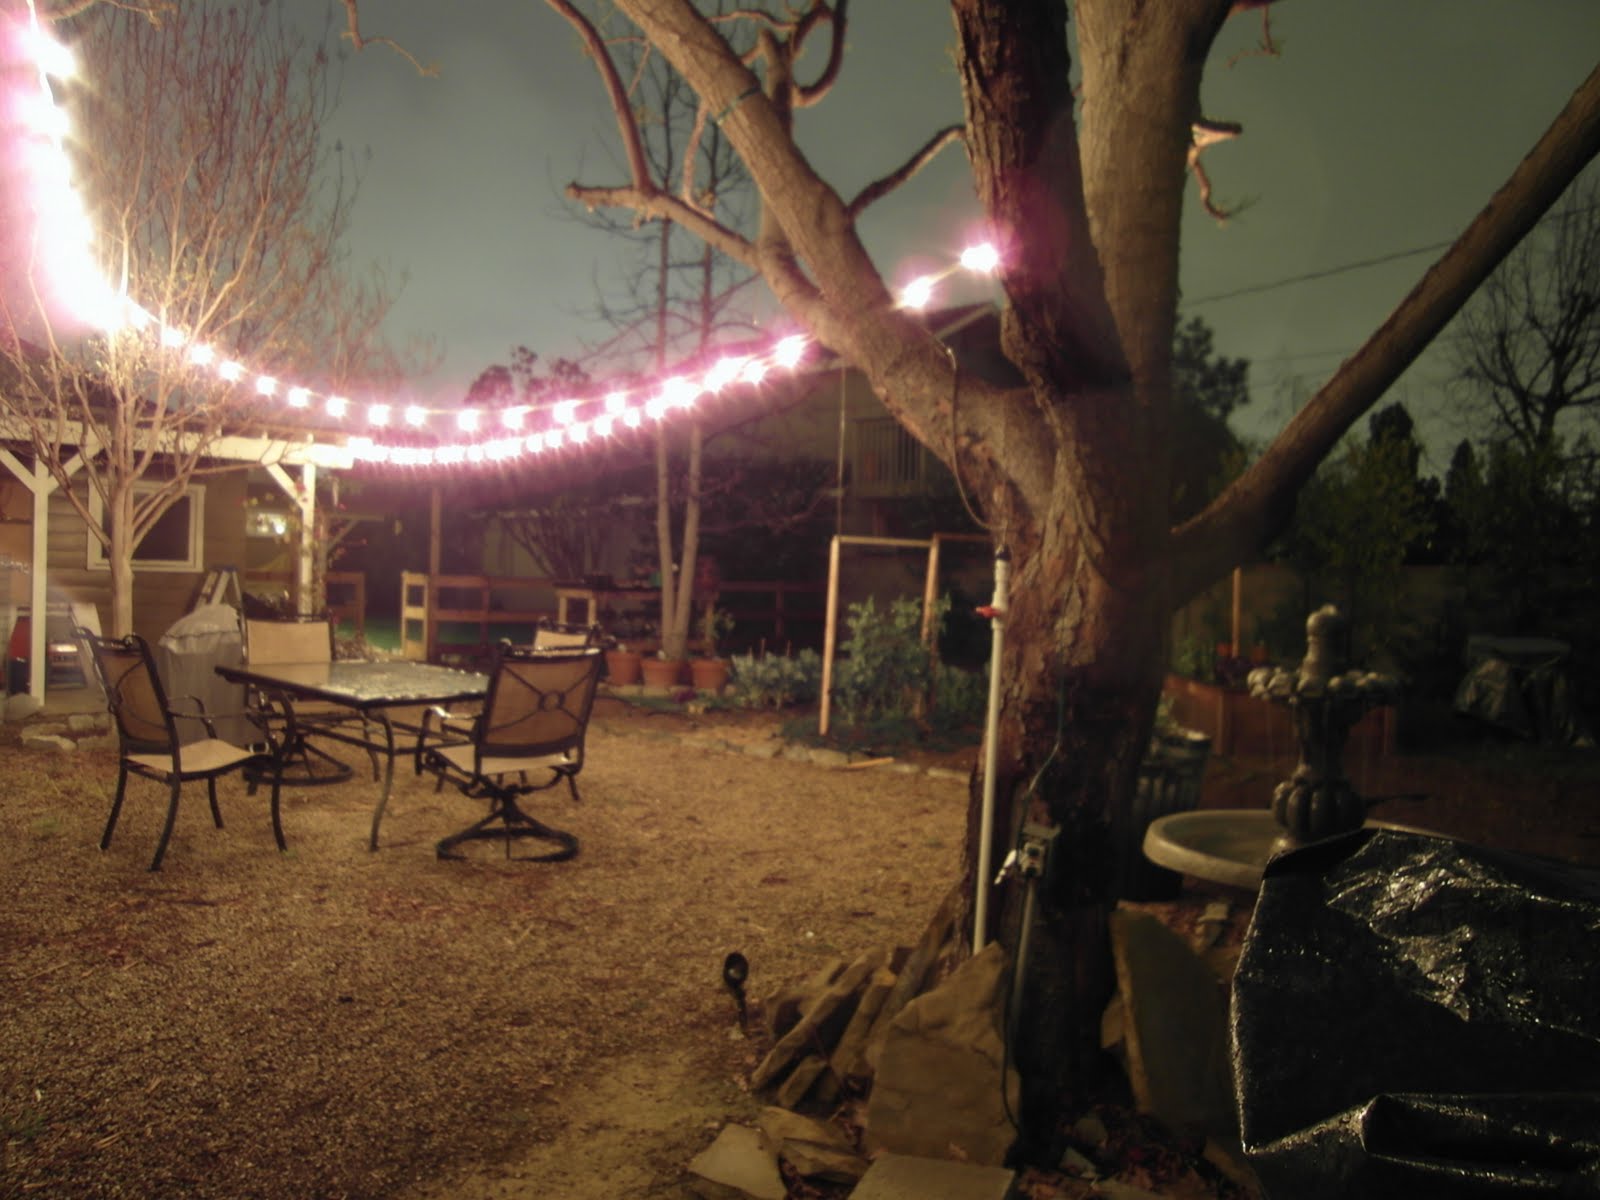 |
| Taken around 8pm with a 6 sec. exposure and ISO100. This was shot from my compost corral and you can see the growing area in the background |
 |
| I think the lighting is so cool, it's eerie 'cause this is was taken late at night |
Friday, March 04, 2011
Nothing to Report
No news, just a Chui photo cause he's such a great dog.
 |
| Taken through a video camera fisheye lens attachment then cropped down a bit |
Tuesday, March 01, 2011
Email Notifications - Sign Up Now
I setup a free (ad supported) email newsletter management service. This will let people subscribe (and unsubscribe) to Maiden Farm's "harvest updates" that I will send when I have veggies available. The idea is that friends and family sign up, then when I have some beans, tomatoes, carrots, compost - whatever, ready to give out I will send an email to everyone subscribed.
To signup you use the blue/gray box on the right side of the blog. Check your spam folder and be sure to add the sender to your "safe sender" list to keep the emails out of the spam folder.
To signup you use the blue/gray box on the right side of the blog. Check your spam folder and be sure to add the sender to your "safe sender" list to keep the emails out of the spam folder.
Beans, beans, beans, I love beans

Subscribe to:
Posts (Atom)