Sunday, November 28, 2010

The best the bed will ever look

Finished the first set of 4 raised beds Today.  After speaking it over with a couple people I decided to keep the raised planter my Dad and I made right where it is and layout the beds around it.  I'm still unsure how much shade the liquid amber is going to cast but I'm hoping it's very little.

The base of the beds is ripped up and chopped sod.  Using a maddox the sod was lifted up, then chopped with a spade into softball sized junks.  The chunks were raked into a long row in the middle of the 36" bed, then spread with a metal rake.  After that soil from the fence post holes was dumped and spread on top.  Finally my first batch of compost from 2010 was spread on the first bed (background in the picture above and right on the pic below)

I expect these will settle and flatten out a bit as they are rained on and the sod chunks compact.  Hopefully they will prove an excellent environment for worms and other critters so I can start building some healthy soil for spring planting.

Chui did absolutely nothing to help in any way.

Thursday, November 25, 2010

Heatin' up!

Compost maintenance Today, flipped one batch and it looked like it would really react from the infusion of oxygen, very soggy and very anaerobic looking.  I was right, 6 hours later it was already up to 150+ and climbing.  It's odd, I know but I get so much enjoyment from managing composting and making it as productive as possible.  Very odd.

Saturday, November 20, 2010

Formal Separation

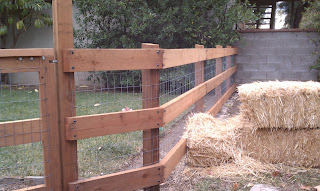
The separation of suburban manicured lawn and home farming is complete!  With tons of generous help from my Dad the fence is complete.

It represents a physical separation from the "nice" part of my yard and my farm area, it also sets a mental tone once you walk past it, as if you've truly entered a different place - this is what I was going for.


I will admit that I was not paying attention while setting the posts and as a result they are not equidistant from one another, by the time this was noticed the concrete had been set for days so there was no correcting the mistake.

The wire mesh is sandwiched between the posts and rails, I did it this way so that you could get a foothold to climb the fence and have a seat.  It also further secures the mesh.

I'm drawing a blank on the name of the screws that were used; they could be best described as between a lag bolt and a Deck Mate screw.  They are incredibly strong and even managed to bog down the Milwaukee Hole Shooter drill motor!  Each time my Dad drove one in and it really pulled tight he would let out satisfactory  "ah-HA!"

In the photo you can see just a bit of the custom hinge work that allows the gate to swing both ways while also being close to the post.  This was a real challenge and the key was moving the pivot point in from the edge of the gate.  Inspiration for this customization came from a door on display at Ganahl Lumber.

Drawing of the pivot location
relative to the post and gate

Funny Pipe

Funny Pipe is so much easier than PVC for quick, short runs.  There are many contractors out there that are starting to do entire irrigation installations using ALL funny pipe or flexible pipe.

Friday, November 12, 2010

Shredder Rebuild

Parts back from the powder coater, engine in the background
Funny, one of my first posts on this blog back in 2005 was about my Craftsman Chipper/Shredder that I purchased to aid my composting efforts.  The shredder worked great for years and even was even leant (a word?) out a couple times to help others with their yard projects.

Well about 3 years ago I left the machine out for the winter completely unprotected, in the rain, cold and wind.  The result of course was that it rusted out and fell into a terrible condition.  It wouldn't start and when I finally did get it running the blades had rusted so bad they had become dull and wouldn't cut.  It was a total waste, the machine was useless.

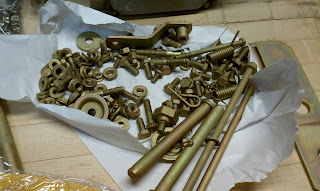
Lots of specialty hardware and pins - well worth the cost
to have it re-plated
Ah, but about 3 months ago I was itching for a project and spied the chipper, decided it needed to be rebuilt and immediately began taking it apart!  Like all my projects it grew in scope, cost and complexity, when the dust finally settled and my wallet cooled off I had ended up doing the following:

  • 100% disassembly of the tool excluding the engine
  • Had the parts chemical and oven stripped ($175)
  • Replaced broken misc. parts (~$75)
  • Had all sheet metal pieces powder coated caterpillar yellow ($150)
  • Had all hardware zinc plated ($35)
  • Engine tuned up and serviced ($50)
It was worth it though, I had two rewarding and relaxing evenings in the garage drinking beer and assembling everything and I've already logged 30+ hours shredding away materials for my compost pile.  This time I'll take better care of it though.

Beautiful!  I had to replace the nylocks
because the over strip destroyed the nylon